Egg custard has been a family favourite in my family since I was a little girl. Mum loved to make it when we were recovering from an illness. Wind the clock forward a few decades and I've continued to make this delicious custard for Darren, our girls and myself. We don't wait until someone is sick though. If we have too many eggs or milk that needs using in a hurry then egg custard is our dessert of choice.
2 eggs
600 mls of milk
2 tablespoons of sugar
2 tablespoons of cornflour
Extra 100mls of milk
Add the eggs, milk and sugar to a medium saucepan and whisk well to combine over a low / medium heat.
Using the extra milk in a cup, add the cornflour and blend well until there are no lumps. Add this mixture to the saucepan and whisk in well.
Continue whisking the ingredients and bring to a slow simmer.
Turn off the heat when the custard thickens.
NOTES -
* Be careful that the heat isn't too high as the milk will catch on the bottom of the saucepan and burn. That's why I like to whisk continually while it heats.
* This recipe can be doubled if you need to use up more milk or eggs.
* Great eaten hot or cold by itself or with fruit.
My frugal list is quite small this week due to illness. After recovering from gastro last week I caught Darren's cold this week ( sharing is caring ). Combined with working three days this week plus organising food for an Australia Day bbq on Thursday, I'm suprised I had any strength left to do frugal things. Here is my oh so small list for the week-
Showing posts with label Kitchen. Show all posts
Sunday, December 4, 2016
Sunday, November 13, 2016
Slow Cooker Chicken Stock
About 18 months ago I discovered through the Cheapskates Club a recipe for making chicken stock in the slow cooker. It was a light bulb moment for me. I love my slow cooker, I love simple recipes and I love saving money. Making stock in the slow cooker cover all three of these loves.
Here's how I make chicken stock in the slow cooker
1 chicken carcass
3 - 4 bay leaves
1 tablespoon of dried onion flakes
2 teaspoons of dried parsley
1 - 1 1/2 litres of boiled water
Place all ingredients in the slow cooker making sure the carcass is covered with the boiling water.
Cook overnight or for up to 24 hours.
Drain the stock through a colander and use within 2 days or freeze for future use..
To make chicken soup, use the little bits of chicken meat off the carcass once it's been in the slow cooker. The meat is quite easy to get off and it's suprising how much meat a carcass can hide.
Sunday, October 16, 2016
Chop Suey - Aussie Style
Chop suey was one of the first recipes I learn to make as a newly wed. It's cheap, easy and quite good for you.. It's full of flavour and full of veggies.
250 - 300 grams of mince beef
2 cups of frozen beans, corn, peas ( combined )
1 stick celery finely sliced
3 - 4 mushrooms sliced
Broccoli and cauliflower florets cut into small pieces
1 teaspoon curry powder
Salt, pepper and chives / parsley to taste
2 handfuls of cabbage, spinach or silverbeet finely chopped
1/2 pack 2 min noodles
1/2 packet of chicken noodle soup
Dried onion flakes and garlic granules ( or fresh )
I medium carrot, peeled and finely sliced
Cut all veggies and place in microwave veggie steamer and cook in microwave on high for 8 mins.
While the veggies are cooking, cook the mince in large electric frypan.
Put the chicken noodle soup into a measuring jug and add 1 cup of boiling water and stir. Add to the meat
When veggies are cooked, add them to the meat. Add curry powder and seasonings to taste. Stir well.
Add cabbage / silverbeet / spinach on top of the meat and veggies and place the lid on for 5 mins. Stir everything together and add extra water if needed.
Add cooked and drained 2 min noodles just before serving.
Serve with a dash of soy sauce and rice or mashed potato on the side.
Serves 4 - 5 people
* Yummy as leftovers on toast
* Can be made with chicken and bacon as an alternative - known as Chop Chicken
* Leftovers can be frozen
* You can use any veggies you want and as many as you want
Sunday, October 9, 2016
Surviving A Kitchen Renovation. Part 1
Planning ahead of time is the key to surviving and staying sane. The kitchen is the heart of a home so when it gets ripped out, chaos can arrive. Here are some ideas and hints that we used to survive our kitchen renovations.
* Setting up a temporary kitchen. This can be quite a big task. For starters, you'll need to empty your kitchen completely. I started by packing everything I haven't used in a while. All these items were boxed up, labelled and stored under the dining table out of the way.
Then I worked out a menu for the next two weeks. After that I got out every utensil, pot and appliance I needed to make those meals. All these things were stacked neatly on top of the dining table. I tried to keep things in groups for each meal. Anything that would be used regularly was put to the front of the dining table.
Here are the items we used often -
Kettle, toaster, microwave, microwave veggie steamer, chopping boards, sharp knives, cutlery, tongs, peeler, electric fry pan, medium fry pan, medium saucepan, portable electric hot plate, dinner set ( 4 of each item only ), serving spoons, cling wrap, foil, plastic bags, plastic storage containers, serviettes, glasses and paper towel. I left out the slow cooker but didn't use it.
* Planning a menu. For a couple of months leading up to our kitchen renovations, I froze every single leftover from our main meal. No one got a chance to have second helpings. By the time our kitchen had been ripped out, I had enough single serves for four nights ( 16 serves ).
When I wrote out our menu, I spaced out the freezer meals so that we wouldn't be using them up straight away. I also tried to use those meals on days when we couldn't get into the kitchen area to do anything. In between those meals I tried to fit in easy cook meals like spag bol, bbq and salad, honey mustard chicken, sliced meat baked potatoes and salad,
* Eating healthy. This was really important for me to be able to still provide good meals for my family. Darren joked that we could have takeaway for two weeks straight. Infact, we had quite a few people tell us this was the way to go. For starters we can't afford takeaway that often. Secondly, I don't like many takeaway options. Thirdly, I'd feel sick after a few days. We always have lots of fresh and frozen veggies on hand. Some nights the meals looked a little different to the usual but we always had a few veggies on the plate.
* Going to bed at a decent time. Some nights this was hard to do but I tried to be in bed by 11 or 11.30pm. We soon learnt that tradies work to a different clock. They like a really early start. One tradie tried to come to our place at 7am only to be told by the kitchen company that was unacceptable.. This is why getting enough sleep is important. You need to be showered, fed and presentable before the tradies show up.
The finished product was worth it. |
Our temporary kitchen |
The items we needed |
Trying to keep everything in order. |
Stayed tuned for Part 2 coming soon.
Sunday, October 2, 2016
Lemon Slice
I love pretty much anything lemon flavoured including this lemon slice. The trick to making a great lemon slice is to include lemon juice in the icing on top. The more zing the better. I've tasted a quite a few lemon slices that don't have the lemon flavour and I've been left wondering what slice it was.
This slice keeps for a couple of weeks in the fridge and travels well too.
1/2 a tin of sweetened condensed milk. I think the current size is 400grams
125 grams of melted butter
1 packet of Marie biscuits or similar sweet biscuit
1 tablespoon of lemon juice
1 cup of shredded coconut
Grated zest of 1 medium lemon ( I like to add more )
Crush the biscuits with a rolling pin or in a food processor.
Add all other ingredients and mix well until everything is wet.
Place into an oblong slice tin and pat down with the palm of your hand.
Refrigerate for one hour
Lemon icing -
Approx. 1 1/4 cups of icing sugar
juice of 1/2 a lemon
Mix together until a thick icing is made. Add a little extra lemon juice if needed.
Spread the icing over the slice working quickly to even and smooth it out
Add a little extra shredded coconut to the top of the icing and press slightly into the icing.
Return to the fridge to set.
To cut the slice, take it out of the fridge for 1/2 hour before cutting. It can be cut in the tin or taken out and cut.
Store in containers with baking paper between each layer.
Sunday, September 18, 2016
Planning A Kitchen That Works - Part 1.
I love my new kitchen. It's clean, shiny and works so well. I guess 20 years of dreaming and planning has paid off. It also helps that I've been cleaning other people's kitchens for the last 18+ years too. This has given me the chance to see what works and what doesn't. Here are some things to consider when planning a new kitchen -
* Pull out tap. These taps make it easy to rinse off large pots and to swish a sink clean.
* Stone bench top color and edge. If you get a stone bench top, consider the color you choose. A black or dark color is very hard to keep clean. Every wipe mark and smear shows up no matter how hard you try to keep it clean. Stone benches will have joins in them. Choosing a light color with detail helps to conceal the joins. The edge of the bench matters too. If you pick a slightly rounded edge it prevents damage to your clothes.
* Drawers. Replacing cupboards with drawers makes it easy to access everything. No more bending down and digging into the back of a cupboards. Please note, drawers might not hold as much as you think. I had to do another declutter to fit everything in. At least I've only kept the things I really love.
* Corner cupboards - lazy susan or not. When I picked out my kitchen, I was shown a corner cupboard with a lazy susan in it. At first glance it seems like a great way to access everything. Unfortunately the shelving is not as strong as a regular cupboard shelf. I like to stack casserole dishes inside each other to maximise space. A lazy susan would only be good in a plastics cupboard.
* Sinks are smaller. When I was researching the sinks available to buy, I was quite suprised to find that sinks have shrunk in size over the years. Please keep this in mind when choosing one for your kitchen. I picked the biggest I could find. Even doing that, I lost 20 centimetres off my old one.
* Range hood with canopy or pull out. Range hoods with a canopy might seem like all the rage on those cooking shows. Keeping them clean is another issue. When cooking, steam rises. So does the oil you cook with. Before you know it your range hood has a layer of grease that can be a pain to remove. Even if you do remove it, you'll see the wipe marks from your cloth. I've wasted so much time cleaning clients canopy range hoods only to see they are still not perfectly clean. I chose a Westinghouse 90 centimetre pull out range hood. The filters can be pulled down and cleaned in the dishwasher.
Drawers |
Pull out tap |
Detail in a bench hides the join |
Sunday, August 28, 2016
Finding Room To Stockpile
Quite often people ask me where I find the room to stockpile. The answer is simple - I make the room. I'm not a hoarder by any stretch of the imagination. Infact, I love order and neatness and this helps me to make the most of the room I have. My home is 15.23 squares or 141.57m2. For my American readers that equates to 1523.8 square feet. With four of us living here that doesn't allow for large amounts of storage.
Our kitchen is quite small and classified as a hostess kitchen which I think is a polite term for a small kitchen that does the job. Our kitchen builder tells me that my pantry is quite a good size compared to others he sees. My pantry is 88cm wide x 57cm deep x 2.06 metres high. Not large at all but I can fit so much in there. At the Adelaide workshop Cath and I held last year I showed a photo of my very tidy pantry. There were a few giggles about how neat it is. how many containers I have and how everything is in neat rows with ALL labels facing the front. A bit OCD ? Maybe, but when everything is neat and well stacked I'm making the most of the space.
I mentioned at the workshop that I only use my pantry to store food in. There are no empty containers, no extra rolls of paper towel, no toilet paper, no appliances, no cleaning products, no boxes of tissues, no canning jars and no cat food. These items are either stored in my garden shed or in the appropriate room ( cleaning products in the laundry etc ).
I also use everything in my kitchen on a regular basis and all my casserole dishes, chopping boards, dinner sets etc are stacked neatly and efficiently. This gives me the extra space to store supermarket specials Before I had children, I worked in retail ( mostly toy shops ) and my specialty was merchandising shelves to fit more stock in when there was no space. I've just continued this at home and especially in my kitchen. I'm always sorting and rearranging my kitchen cupboards.
For those of you who think they can't find any more space to stockpile, just take a few moments to look at what you are storing.
* Do you use it all the time ?
* Are you keeping things you really shouldn't ?
* Do you have too much of the wrong type of foods in your pantry ? This question is targeted more towards junk food or food with too much packaging. Think about those packets of chips that are full of air or the individual serves of popcorn, chips etc etc. A jar of corn kernels takes up a fraction of the space compared to a packet of individual serves.
* Could you store items in your linen cupboard , under your bed, in the top of your wardrobe ?
* Could you fill up all your containers to get rid of half empty packets taking up space ?
By doing a little reorganising and decluttering, you might be suprised at the space you can find.
Does your pantry and kitchen need a tidy up ?
Where do you store your extra stockpiling items ?
Tuesday, August 16, 2016
My New Kitchen
It's now time to reveal my new kitchen - YAY !!! The tiling was completed today and I've just given them a wipe over. We are still waiting on our second oven which is being made somewhere overseas right at this moment. We've been told it will arrive in Victoria sometime in the first week of September. I couldn't wait that long to show you the kitchen I've been dreaming about for over 20 years. Darren has some painting to do around the door trim and on the new cornices but he's having a little rest after working so hard on the new skirtings throughout the house.
So here it is -
Stay tuned for follow up posts on -
How to survive a kitchen renovation and
How to plan a kitchen that works.
So here it is -
My soft apple green splashback tiles |
The entire kitchen |
Double sink |
Pull out tap |
In sink drainer |
We've ditched the cupboards and gone with drawers |
Fisher and Paykel stove top |
New kettle |
Side opening oven ( one of them ) |
Caesar stone bench top |
New phone connection. It was up on the wall on a shelf before |
Oh so new and shiny |
The fridge has a more fitted look. |
Slightly wider bench top |
Drawer handles |
Cupboard handles |
New bamboo flooring and skirtings. |
The old kitchen |
Stay tuned for follow up posts on -
How to survive a kitchen renovation and
How to plan a kitchen that works.
Sunday, August 7, 2016
Ice Cube Trays - 5 Uses To Save You Money
The humble ice cube tray has been around for a long time. With the invention of ice makers in fridges, it seems that people are either donating their ice cube trays to the op shop or forgetting to use them.
Ice cube trays are not just for water. They have many uses that can save you money and reduce food wastage. Here are five uses for you to try -
* Freezing lemon juice. When your lemon tree has abundant fruit, juice the lemons and freeze the juice. If someone offers you a bag of lemons, it as a blessing. You may never need to buy lemon juice in a bottle again.
* Freeze tomato paste. Have you ever opened a jar of tomato paste to only use a tablespoon or two ? Usually the contents need to be used in a few days. By portioning the paste into ice cube trays you are eliminating waste. When cooking spag bol or other tomato based dishes, pop a tomato paste cube into the dish for added flavour.
* Chopped fresh herbs freeze well when a little bit of water is added to the mix and frozen into cubes.
* Make coffee ice cubes for your iced coffee. There's nothing worse than normal ice cubes watering down your iced coffee. This idea is great for using up left over coffee from the pot.
* Freeze yoghurt into cubes to add to your smoothie. This is a wonderful idea for using up yoghurt before it goes off.
Stayed tuned for more ice cube uses in the coming months.
Ice cube trays are not just for water. They have many uses that can save you money and reduce food wastage. Here are five uses for you to try -
* Freezing lemon juice. When your lemon tree has abundant fruit, juice the lemons and freeze the juice. If someone offers you a bag of lemons, it as a blessing. You may never need to buy lemon juice in a bottle again.
* Freeze tomato paste. Have you ever opened a jar of tomato paste to only use a tablespoon or two ? Usually the contents need to be used in a few days. By portioning the paste into ice cube trays you are eliminating waste. When cooking spag bol or other tomato based dishes, pop a tomato paste cube into the dish for added flavour.
* Chopped fresh herbs freeze well when a little bit of water is added to the mix and frozen into cubes.
* Make coffee ice cubes for your iced coffee. There's nothing worse than normal ice cubes watering down your iced coffee. This idea is great for using up left over coffee from the pot.
* Freeze yoghurt into cubes to add to your smoothie. This is a wonderful idea for using up yoghurt before it goes off.
Tomato paste portioned. |
Lemon juice has so many uses. |
Wednesday, August 3, 2016
Kitchen Sneak Peak.
My new kitchen is progressing along nicely. The tradies have all been lovely, polite and very helpful. Monday was rip out / demo day. Within a couple of hours my old kitchen disappeared never to be seen again. Darren asked if I was missing my old kitchen to which I replied " NO !! ". I did take plenty of photos of it but I was not attached to it at all. Yes, the old kitchen and I had done the hard yards together for over 20 years. But it was not my kitchen. I didn't pick it out. It came with the house.when we moved in.
Tuesday the new cabinets were fitted in and the kitchen was starting to take shape. That night I was able to start filling the drawers and cupboards with plates, appliances and odds and sods. It was lots of fun fitting things in and there was a toss out of items that no long fit ( or I could do without ).
On Wednesday the stonemason came to take the template for our kitchen bench. Darren spent the day installing new skirtings in Jessica's room and doing basic housework while I was at a cleaning job.
Today is Thursday and the plasterers are installing new cornices around the overhead cupboards. This afternoon the electrician is hoping to install one of my ovens. I've ordered two side opening ovens but unfortunately they are hard to get. There are only six in Australia at the moment and I have one of them. We've been told it could be another couple of weeks before they are made again.
It's been a challenge trying to get basic meals organised. We've had freezer meals for two nights and chops cooked on the bbq with salad and a bread stick the other night. Tonight we are having tacos. I have a single hot plate that fits a medium fry pan. Lots of fun. It's like camping.
There's a sneak peak photo of my new kitchen -
Sunday, July 31, 2016
What's Taking Up Space In Your Pantry ?
During the Cheapskates workshop in Adelaide last year, I mentioned that I removed a few non food items from my pantry that were taking up space. Since then I've received a few messages and emails from participants who found this to be a light bulb moment.
So this week's topic is " What's taking up space in your pantry ? " My pantry is 88cm wide X 57cm deep X 2.06 metres high. Not large by any stretch of the imagination but I can fit a lot in there. At the workshop I showed a photo of my very neat pantry. There were a few giggles about how neat it is. how many containers I have and how everything is in neat rows with ALL labels facing the front. A bit OCD ? Maybe, but when everything is neat and well stacked I can fit so much in.
I mentioned at the workshop that I only use my pantry to store food in. There are no empty containers, no extra rolls of paper towel, no toilet paper, no appliances, no cleaning products, no boxes of tissues, no canning jars and no cat food. These items are either stored in my garden shed or in the appropriate room ( cleaning products in the laundry etc ).
Once non food items are removed from the pantry, you might be suprised at how much space you have. For me, space means stockpiling and stockpiling means peace of mind.
This week I'd like to challenge you with two questions -
* Do you have non food items taking up valuable space in my pantry ?
* Can you relocate the non food items and start a healthy stockpile ?
Do you think I have enough tea bags ? |
I like nice neat rows. |
Sunday, July 10, 2016
Making The Most Of Citrus Fruit.
When most people think of Winter they think of colds, the flu and putting the heater on. I love Winter for the cold weather, comfort food and most importantly, citrus fruit. At this time of the year citrus fruit is in abundance and it's cheap. My girls love oranges as a Winter snack. They cut them up into eighths and eat every last drop of pulp. Much better for you than store bought orange juice and cheaper per portion size.
I love to make 50 / 50 cordial for the family . It's made with 3 oranges and 3 lemons. So to have the cheap Winter fruit available for cordial in Summer, I zest and squeeze the oranges and lemons into a container and freeze. I also make a whole orange cake that uses one orange. I just blend the whole orange ( minus the pips ) in the food processor and freeze it in a container for all year round baking.
Lemons are coming into season too. With supermarkets selling them at 80 cents each, I'm very grateful that my lemon tree is in it's sixth season of bearing a good amount of fruit. To make the most of the "free" lemons, I zest them and freeze the zest for lemon slice, lemon and pistachio biscuits, lemon chicken and savoury chicken or salmon flan. Then I juice them and pour the juice into ice cube trays and freeze. The ice blocks are stored in an airtight container to be used on fish , pancakes, to make lemon butter, jam. lemon slice etc, etc. This year I'm planning on slicing some lemons and freezing the slices to make lemon chicken.
It's great to have these items on hand in the freezer. It stops the need to run to the supermarket for one lemon. I'll bet it would be out of season and you'd be paying premium prices.
If you haven't thought about it before, growing a lemon tree is great. It looks good, the blossoms and fruit smell divine and a bowl of lemons on the kitchen bench is a little ray of sunshine in the middle of Winter. It can be grown in a pot too. Best of all, you'll get your money back from the cost of a tree in no time.
So if anyone offers you a bag of lemons, or your neighbour has a tree with too much fruit for them to use, you'll know what to do with it.
Lemon butter |
Orange cake and muffins |
Freezing the juice. |
Lemon butter for presents |
Getting ready to make 50 / 50 cordial. |
Sunday, July 3, 2016
Starting A Stockpile
Anyone who knows me knows that stockpiling is one of my favourite topics to talk about. I LOVE stockpiling. It gives me a sense of security knowing that if anything happened and I couldn't get to the shops, OR if all the supermarkets closed down without notice ( I'd better start praying against that one ), then my family would be fed well for many, many weeks, maybe even 4 - 6 months. Ok, if I was feeding them for 4 - 6 months, we'd be on rations but I think I could do it.
I know of people who shop every day for that night's meal. I also know of people who only keep a couple of week's worth of groceries and they always seem to be running out of the basics. This is no way to live your life. Think of all the stress and extra trips to the supermarket. Think of all the petrol being used. Here are some scenarios to think about -
What if you got sick ?
What if the car breaks down ?
What if family drops in unexpectedly for a holiday ?
What if your teenagers bring home a bunch of friends and expect a meal for all ?
What if your spouse invites some friends home for a meal without a prior arrangement ?
What if a natural disaster happens and it wipes out crops ?
What if you are stranded in your home due to floods ?
How would you cope if any of these things happened ? Yes they could easily happen although I really hope they don't. Do you go into a panic and order takeaway ? That would be so easy but then your food budget would blow out. A better way is to have a good supply of basic ingredients.
Stockpiling is as easy as 1 2 3 .
1. Write out a list of basic ingredients that you would like to stockpile. Toiletries such as toilet paper, deodorant, shampoo, conditioner, soap, shower gel, shavers, makeup all keep well for many years. In the pantry - flour, sugar, pasta, rice, tinned veggies and fruit, herbs and spices, baking ingredients, spreads, powdered milk, sauces etc all keep well.
In the fridge - cheese and butter can be stockpiled as well as frozen. Even eggs keep well in the fridge for a few months. In the freezer you can stockpile veggies, meat, leftovers, ready made meals ( homemade of course ) berries and other fruits.
2. Work out the quantities of these items you use per month. Then multiply it by the amount of months you want to have as a stockpile.
3 . Add some of these EXTRA items and quantities to your shopping list each week / fortnight / month you go shopping. Remember, these are extra quantities on top of what you usually buy. Once you have finished stockpiling all you need to do is just replace the items you use. Also, do not forget to rotate your stock by putting new items to the back of the pantry, fridge and freezer and the older items get pushed to the front.
Finding extra grocery money for stockpiling can be a challenge if you are on a tight budget. Please keep in mind that basic groceries like flour, sugar and pasta etc don't cost that much. Here are some ideas for finding extra grocery money -
* Use leftover holiday spending money. This is how I started my food slush fund.
* Make your own takeaway and the money saved could start your stockpile.
* Revise your shopping list and cross off ready made / processed food.
* Cook cheaper meals to stretch your $$$
* Save your spare coins in a tin. At the end of the month that money can be used to buy a few extra basics.
Do you have a stockpile and if so, how long would it feed your family ?
If you haven't started a stockpile, is this something you'll do shortly ?
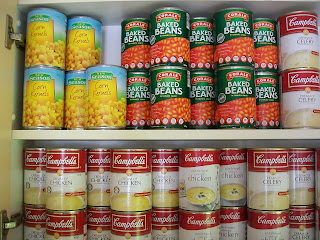
My spare tins of food. |
An organised pantry |
My spares. I love things stacked neatly |
Sunday, June 26, 2016
Whole Orange Cake
This orange cake has a lovely rustic flavour and texture. It's not too sweet and the orange flavour is authentic. I hope you enjoy it as much as we do.
1 whole orange
1 cup of white sugar
3 eggs
1 cup of Canola or Olive oil
2 cups Self Raising flour
1 cup of white sugar
3 eggs
1 cup of Canola or Olive oil
2 cups Self Raising flour
Cut the orange in 8 pieces taking out any pips. Whiz in a food processor until smooth.
Add the eggs, sugar and oil and whiz until well combined.
Add the flour and whiz again, scraping down the sides of the processor.Pour the cake batter into a large greased and floured fluted ring cake tin or two medium loaf tins
Bake in a 180 degrees Celsius oven for about 40 minutes until the middle springs back.
When the cake is cool, turn onto a cooling rackThis cake can be iced with lemon icing and dusted with coconut.
Notes -
* Yes you need to use the whole orange - rind and all ( except the pips and sticker ).
* The batter can be baked into little cup cakes.
* The cake can be frozen.
Subscribe to:
Posts (Atom)